God Bless the Little Children

The rental house south of us has a large back porch on the second floor that overlooks our chicken yard. Maymay grew up with our chickens – her little voice learning to say ‘Chicken!’ as she watched them from the porch. Later her dad Mike would bring her by to visit with the chickens on ground level and also poke around the yard. We loved it.

Eli patiently feeding the hens dandelion greens.

Eli patiently feeding the hens dandelion greens.

Mike and Ann bought their own place this winter and we were sad to see the enthusiastic little family move on. Luckily, our new neighbors are super cool and have little children who are also fascinated with our chickens. Dave and Chrissy have already brought over Eli (4?) and Olive (2?) who are getting good at feeding the chickens (well, Eli is good at it. Olive is just enthusiastic.).

IMG_6111

Olive watching the hens in their house

IMG_6108

Eli ‘I’m really good at this’ on the push mower.

They also have a penchant for yard work! Eli cut the grass yesterday for 25 minutes and cried when it was time to stop.  As if that weren’t enough, Eli is also very fond of the rock collection that I have on ‘display’ under the pear tree, so he’s way OK with me.

IMG_6113

Eli made space so that Olive could push, too.

Posted in chickens, Family | Tagged | 2 Comments

Sprouting greens for chickens

Successive sproutings of grains for the hens

My chickens spent most of their time in a (large) enclosure that they have picked free of greens. I want them to be happy – and to produce healthy eggs, so I pick them dandelion leaves, I leave them piles of fresh cut grass. I mean to revisit the food fence and grazing frame, but then I saw this on Pinterest: sprouts.

I won’t extoll the benefits of sprouted grains here, but the list is long. Chickens can eat all parts of the sprouted grain, and it can be a complete meal if you provide enough, needing only access to grit and calcium to ensure health.

I have built a self-watering system based on plans I bought from another DIYer. There is a sump at the bottom, and three trays with drain holes of successively sprouting grains. I bought 50# bags of barley and of oats (just $20 each!) at Hayes Feed in Burien. The first tray is a mix of oats and barley, the second is barley, the third oats. I expect they differ in their ease and timing of germination, so I’m checking that out.

It’s also taking hella longer than my readings. Instead of 6 days, I’m at 2 weeks and counting. Pretty sure that’s cause the temp is so cool. It’s out in the shed now, but I may have to move this operation indoors in the winter.

A word of caution if you design and build one yourself: use a bigger sump. Even though each tray drains into the next – the force of water being what it is, there is some splashing that gets the floor a little wet at the periphery of my sump.

Looking forward to presenting this gift to my hens! Keep ya posted.

Posted in chickens, DIY | Leave a comment

The Year of Nitrogen

Soil Test Kit

Soil chemistry testing with LaMotte Soil Test Kit!

I have tested my soil nutrients and composition before. I made some lame attempt to address deficiencies, adding compostfor depleted nitrogen and fireplace ashes to raise the pH. Results were – meh. THIS year, I vowed, would be different. I would have the patience to get to the bottom of my soil conditions and scientifically address them!

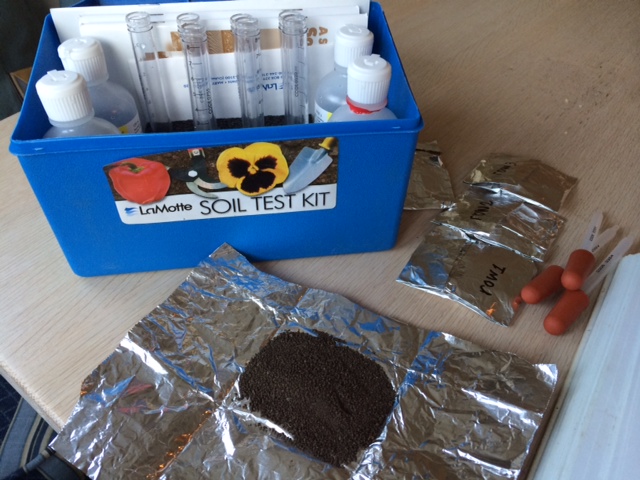
Out comes the Lamotte Soil Test Kit. I love this thing. It reminds me of the chemistry kits I envied but never had as a kid.

Here is the deal:
1. Take soil sample from a few inches below the surface. Integrating from a few spots throughout the bed is a good idea (whatever).
2. Spread out the soil to dry (I used squares of tin foil so I could save the sample for later), removing rocks and plant debris. Crush clump to speed drying.
3. When soil is dry, crush it through a fine seive. I used my fine metal kitchen colander.
4. I also weighed my samples plus the debris that didn’t make it through the seive to calculate % coarseness. Cause I’m a geek.
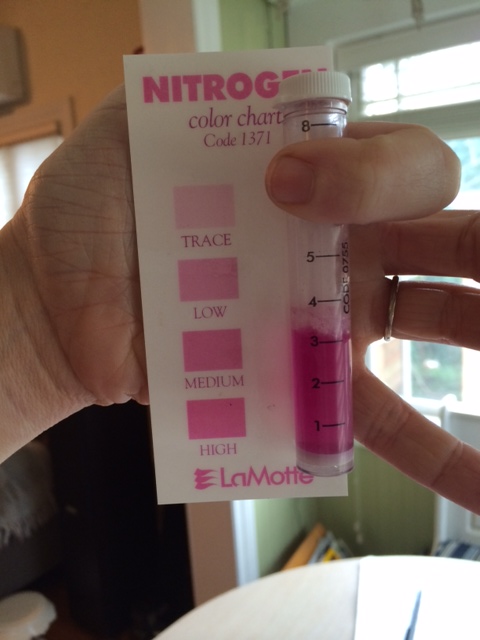
5. Perform soil tests. Kit includes testing for pH, N, P, K.
6. Additionally geek out by performing a soil composition test.

Here are my results:
All of my untended beds (by this I mean completely ignored all winter with no cover crop or protection) had the same results: pH 7-7.5, Trace N, high P, high K. I expected low pH, so maybe this means last year’s fireplace ash application more than did its job. That might also explain the P and K.

The low N seemed extreme and made me wonder if the test was working right. Until I measured my asparagus bed which had – shocking – different results: pH 6.0, High N, moderate P, high K. I had recently top-dressed this bed with 1″ compost, so even though I dug down under that for my soil sample, it would seem compost makes a difference!

I will apply 1# of fireplace ashes/sqyd of asparagus bed to bump the pH closer to 7, but they like it a bit on the acid side, so I’m not too worried.

What do do about a soil that needs a ton of N, but little else? I have decided on feather meal. It contains about 15% N, works at cool temperatures, and releases N for up to 6 months. The LaMott guide suggests 10# N/2000 sqft for ‘Low’ N soil result. Other places I read twice that. So I’m going for 0.01#/sqft. For my 275 sqft of veggie beds, I will need 2.75# of N. At 15% N, that means 18# of feather meal. My local(ish) source sells feather meal in 20# bags – Done!

Soil Test pH High

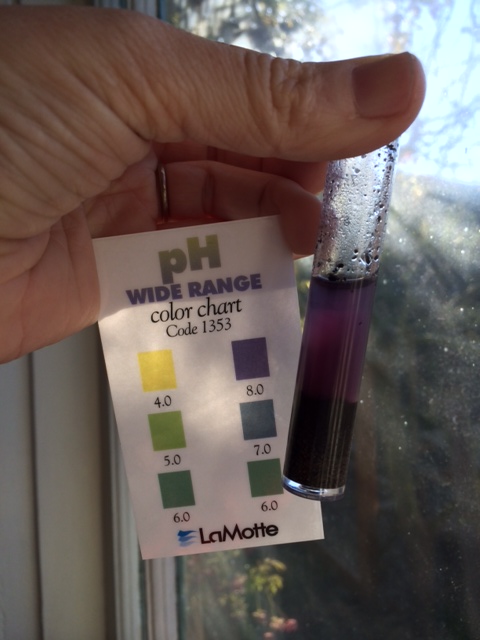
Gorgeous, but can you see how there are two colours there? The purplish-blue one at the surface is the right colour (7.5). Below that, the suspended fines are clouding the solution. When I let this settle for several hours, the water column was all 7.5.

Soil Test P High

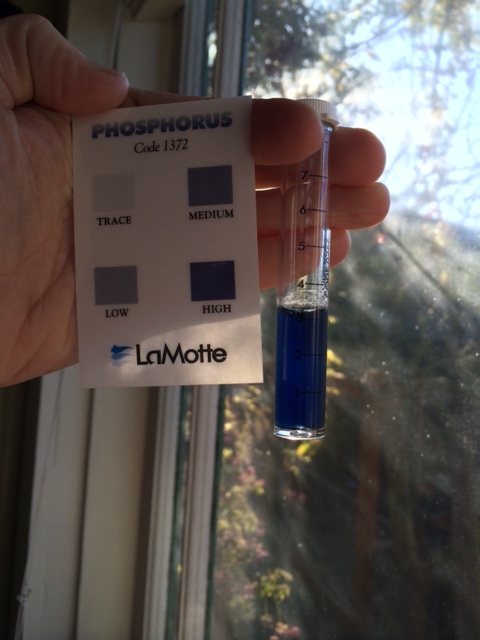
Again – beautiful! But a bit on the high side…

Soil Test N Trace

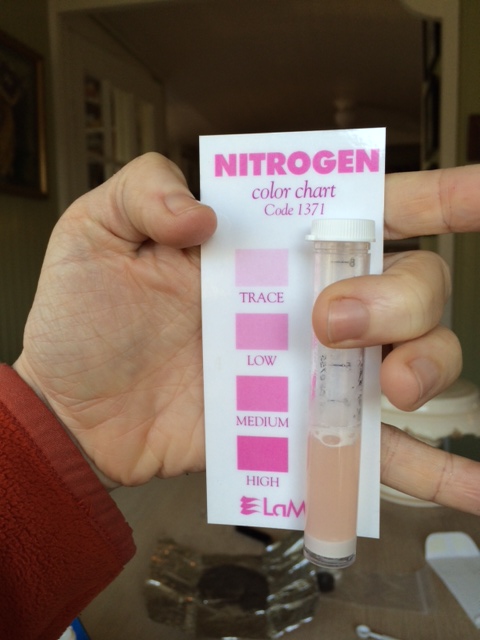
This was the result for most of my beds – making me question whether the test was working properly. Until I saw the asparagus result.

Soil Test pH

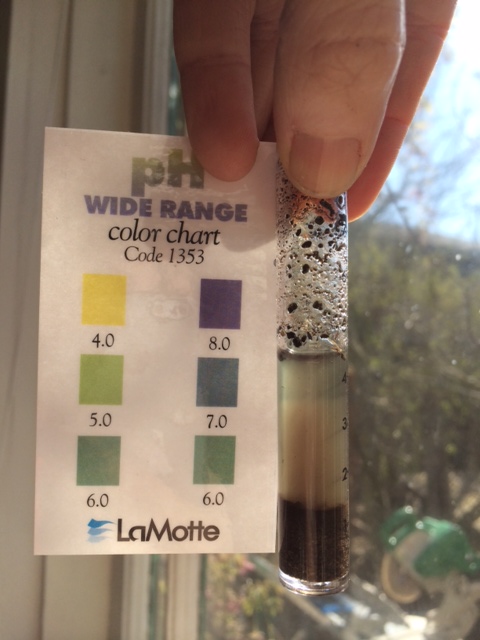
Again, see how the fines interfere with colour interpretation? The blue-green colour (6.60) at the top is correct.

Soil Test N High

Aha! There be nitrogen! This was the recently-compost-ammended asparagus bed.

Posted in vegetable garden | Tagged , , | 2 Comments

Raspberries the Right Way

I finally did it. I trellised my raspberries like I ought to. Although my corralling system has improved over the years, I finally tired of the canes falling over during high winds or leaning all together when heavy with fruit.

This method involves a sturdy system of 4×4 posts, double cross supports, 16 gauge galvanized wire, eye bolts and turnbuckle screws.

photo 5
The extra-special improvement for 2015 involves appropriate thinning and twine.  Very simply, each fruiting cane is attached to the upper wire on one side or the other of the trellis.  Canes are now no closer than 4″ apart and prevented from being blown or bent over. Ta-da!

Twine would around individual canes

Twine would around individual canes

photo 2

The other advantage is that there is now ample space for the new canes to come up between the fruiting canes.

photo 3

photo 4

I am very very excited to test out this tidy system come spring and summer!

Posted in raspberry | Tagged | 4 Comments