Chicken Proselytizers

(photo from the West Seattle Blog!)

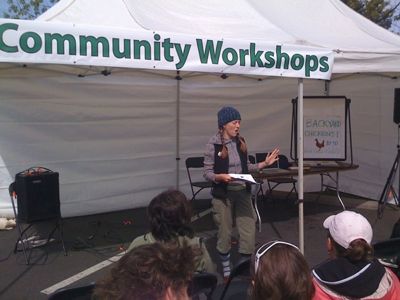
On Sunday, Scott and I volunteered at the Sustainable West Seattle Festival. I think we were the only booth not staffed by a business or nonprofit – just the two of us with our chicken passion. I got a little worried when we arrived to the colourful banners at all the other tables, but we put up a hasty hand-drawn sign, replete with cartoon chicken, and the people came anyhow.

I gave the first talk at the Community Workshop tent. Scott thinks I had the best turn out of the day! I had prepared slides in case it was rainy and I had a small enough audience for my laptop, but the sun came out and a few minutes into my talk I had 30 or more listeners. I passed around handouts and talked for perhaps 25 minutes, with another 20 for Q&A. It was exhilarating to be able to talk about chickens to an interested audience – nothing but chickens for 45 minutes! I’d love to give this talk again, and if I do I will have more visuals!

Scott meantime manned the booth where we had a carton of fake nest box eggs, my eggmen, printed resource sheets, and a running slide show of our chicken photos on my laptop. We met lots of nice people, about an equal number of chicken owners and non-owners. Lots of questions we could answer and some we could not (Q: What to do about dominance hierarchy fights with new introducees? A: Nothing?, Q: How about raising ducks? A: Uhh, get a book from the library?).

Very excitingly, we started, and had great response to, a list for a West Seattle Tour of Chicken Coops. Seattle Tilth has an annual Coop Tour, but it is spread across the whole city and focuses on fancier setups. I was disappointed by it. I wanted to bike to coops in my area, meet neighbours, and see the variety of ways I might raise chickens. Well, West Seattle isn’t even on the coop tour this year, so we’ll just do our own in our own way. If you want to host or attend the tour this summer, leave me a note!!

Posted in chickens, education, Scientific, Sustainability | Leave a comment

Spring in Seattle…continued


The first asian pear blossom!

Spring has Marched through April to May, and the flower parade continues. I’ve never been into flowers, but as they appear for the first time to adorn our yard, I find that I love the splashes of impossible colour. They will stay.

Stunning azalea blossoms with potato boxes in background. Click on each photo to see it full-sized!


Obligate chicken shot – Greta & Rocky hanging on the straw bale

Posted in chickens, flowers, spring | 1 Comment

Starting a new vegetable garden


There are lots of ways to start a new vegetable garden; removing sod, rotting sod, bringing in new soil, and the ‘lasagna method’. I read about them all. And, in the end, I did them all. First though, I tried the easiest: the lasagna method. For a lasagna garden, you create a raised bed by layering organic matter that decomposes over the winter. By spring, you should be able to dig into the top mulch and plant directly into nice composted soil. Or so the story goes.

Upon the beautiful grass, I laid cardboard from our moving boxes, and followed that with layers of fall leaves, kitchen scraps, and some enriched soil from my inherited compost pile. Then I ran out of material. I covered the whole area with burlap bags from the local coffee joint, crossed my fingers, and waited until spring. March 1st, I ordered 4 yds of topsoil/compost and spread a good 4” on top of my half-baked version of a lasagna. Now THAT was looking nice! At the beginning of April, I decided it was time to plant.

The gardening method I am trying this year is the ‘WORD’ system (Wide rows, Organic methods, Raised beds, Deep soils in ‘The Vegetable Gardener’s BIBLE’). In addition to raising beds by adding the soil from dug paths between the wide beds, author Ed Smith recommends loosening the subsoil. When I tried this, my shovel found last fall’s sod still intact. Damn – I was going to have to remove the sod after all.


Much to the delight of the chickens, who nabbed every worm and grub I turned up, I started hand digging the partially-decomposed sod. Aie, my aching back! It wasn’t long before I agreed to Scott’s suggestion and borrowed neighbour Matt’s rototiller to finish the job. Hard work even then! I removed the hunks of decomposing sod that would chatter to the surface, and finally had nice, deep soils that were starting to look and feel like ‘garden’.


As per Ed’s Bible, I marked out rows 3-4’ wide with 1.5’ wide paths between them. Using guide lines, I dug the footpaths, placing the soil on top of the beds, then raked the beds flat. My garden area slopes south and west, so contouring would have been a good idea. But I laid out the rectangle before considering the incline, so when raking the beds flat I tried to compensate by leveling them somewhat. Finally, I laid down newspaper (4-6 layers) and straw on my footpaths, which hopefully will prevent any remaining sod from regrowing. Voila!


One lone spear of asparagus has emerged from the scrawny octopi that came labeled as asparagus crowns 3 weeks ago. Hopefully more will follow. I’ve planted peas, cabbages, carrots, kale, fennel, parsnips, and onions. Marigolds, nasturtiums, and dill were sown at the bed ends to encourage beneficial insects. And so it has begun! Every day a new adventure!


Posted in DIY, vegetable garden | 3 Comments

Newspaper Pots


The tomato seedlings needed transplanting. Their wee roots were poking out the bottom of the egg carton and the true leaves were having trouble growing. Books recommended transplanting to 4″ pots around this time. But I didn’t have any and didn’t want to buy any. So I looked around for a solution that would be free and for which I had the materials. Newspaper pots! There are tons of videos online. Here’s one.

It took me about 3 minutes to make each pot and my fingers got coated in nasty-feeling ink, but I made enough pots to transplant all my seedlings and to start some new ones. Best is, the pots can be planted right in the ground when it’s time to plant them out. Yay!


Tip 1: Place seedling pots on a tray and water the tray, not each pot.
Tip 2: When planting newspaper pots, be sure top edge of paper is buried so soil moisture is not wicked into the air.

Posted in DIY, starting seeds | 2 Comments